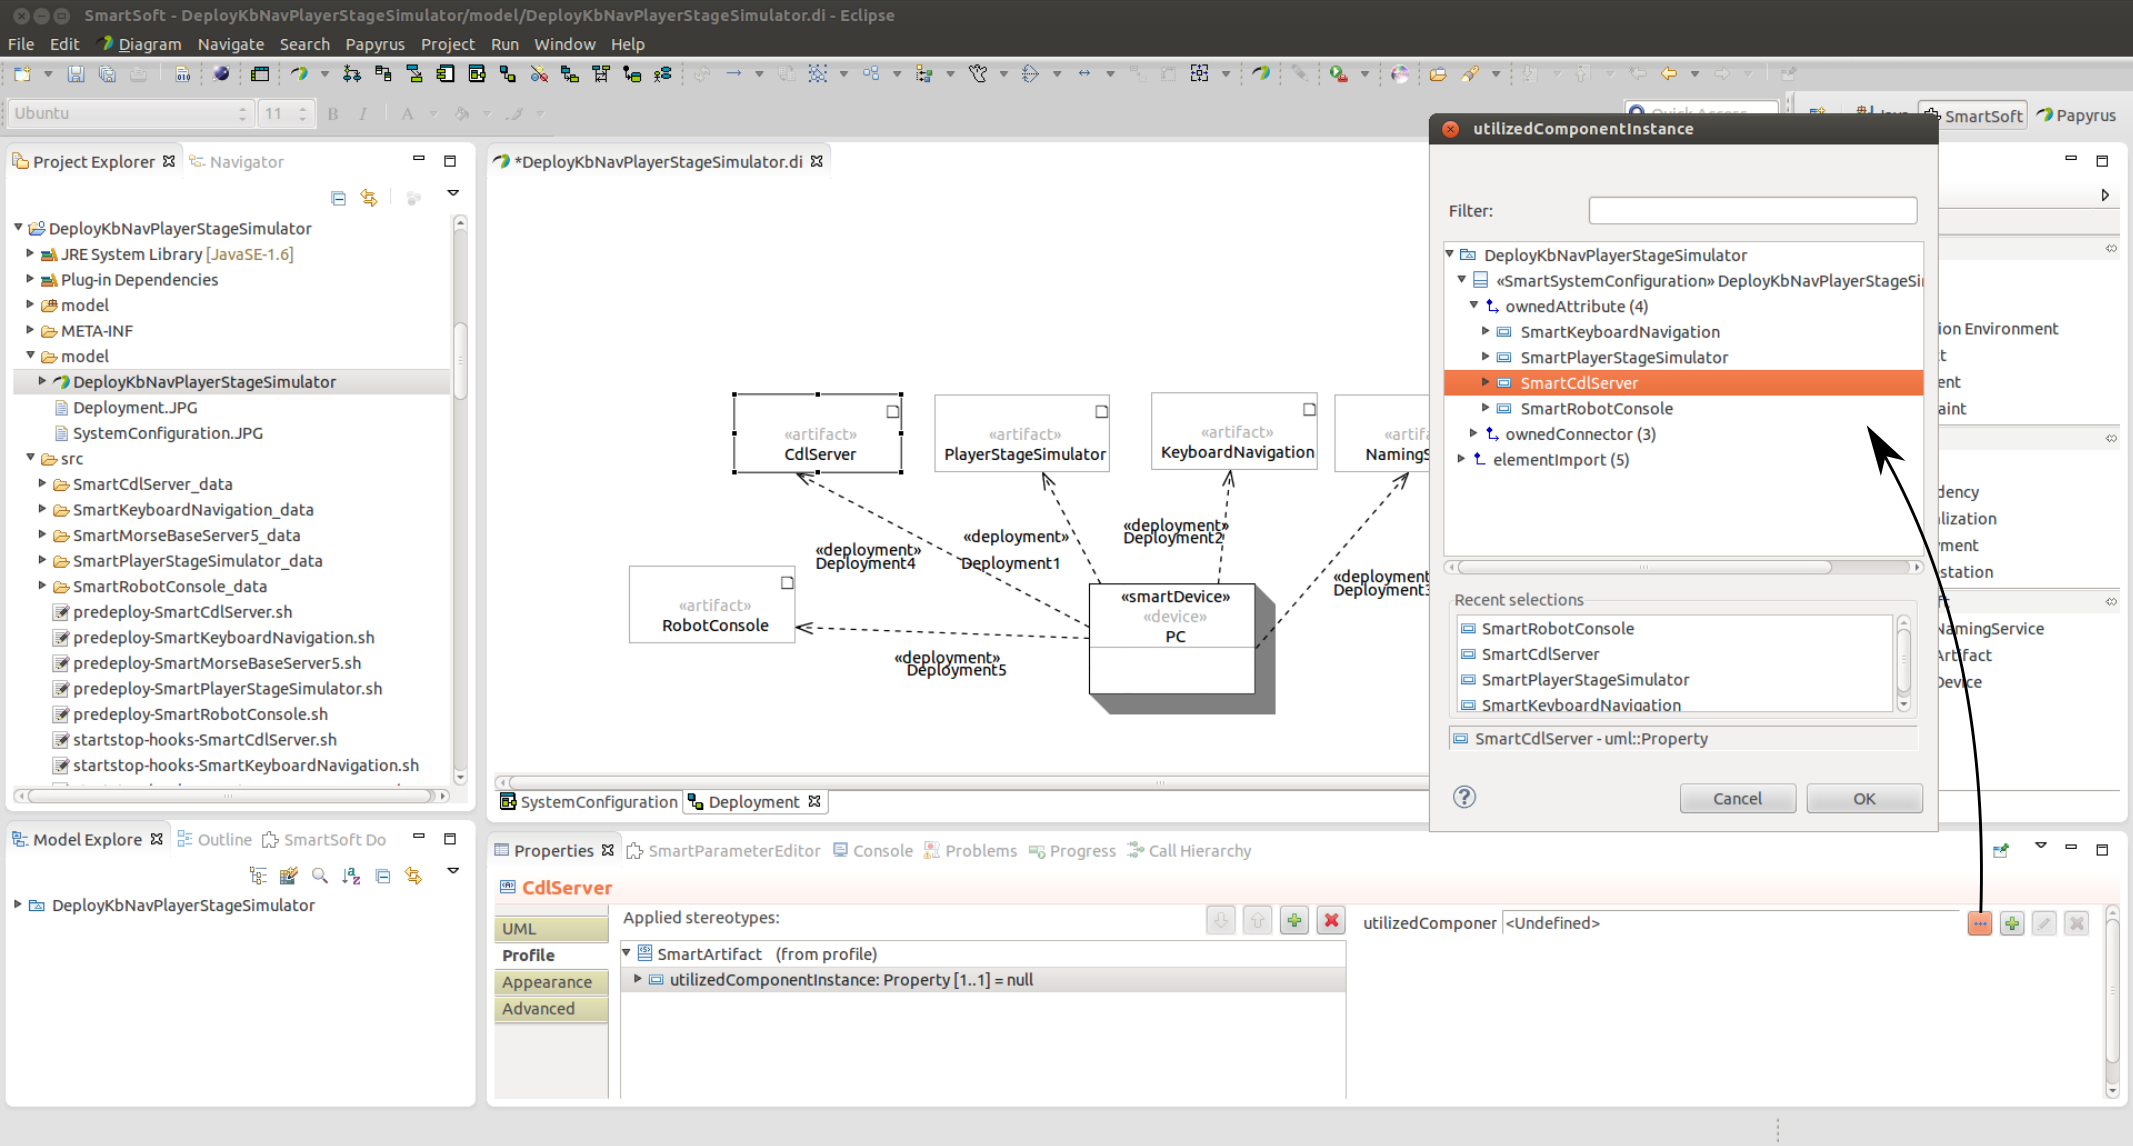
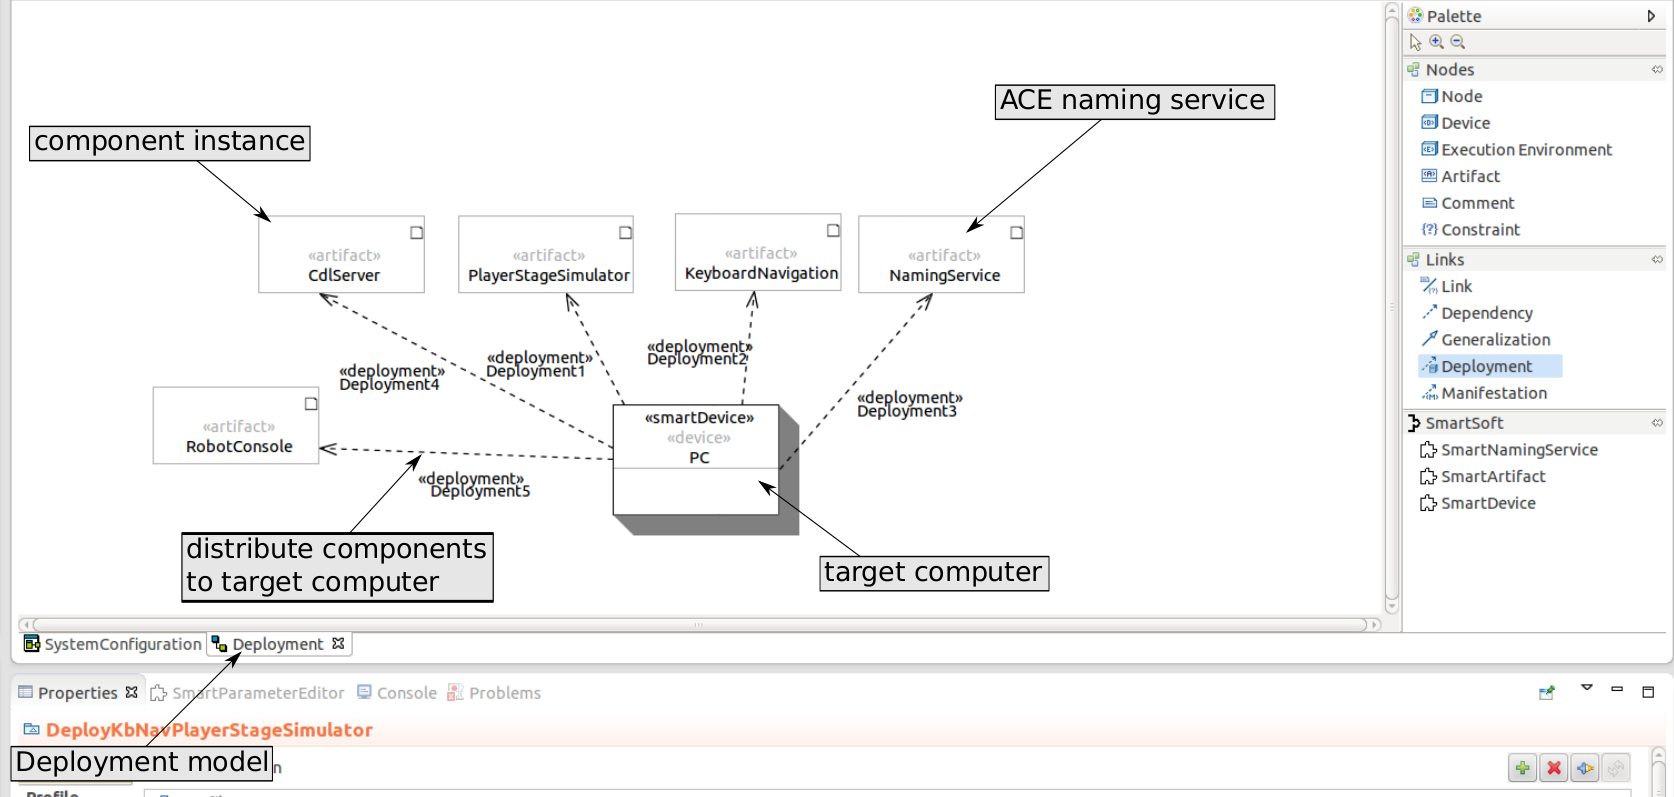
An element is added to the deployment model by selecting the element in the tool palette and a left mouse click on the model. Due to a bug in PapyrusUML the stereotypes are not applied correctly. Therefore, the stereotypes have to be added manually. To this select the element and add the stereotype by clicking the "+"-button in the Properties tab (Properties->Profile). Figure 2.33 illustrates the modeling of the system deployment with the SmartMDSD Toolchain.
SmartDevice: The SmartDevice element is used to model target computers to which the components are deployed. The following settings can be made:
ip: Specifies the ip-address of the device. Default is 127.0.0.1
loginName: Specifies the login name of the device. If the value is an empty string, the login name will be the name of the current user logged in.
deploymentDirectory: Specifies the storage location of the deployment. Default is ~/tmp/
SmartArtifacts: SmartArtifacts are used to model component instances which are already modeled in the system configuration model. For every component instance in the system configuration model a SmartArtifact has to be added. The modeled SmartArtifacts are distributed to a target computer with a deployment arrow from the target computer to the component instance. The following settings can be made:
utilizedComponentInstance: Specifies the component instance. To slect the component instance press the "..."-Button on the right, choose the instance in the appearing dialog and press the OK button.
SmartNamingService: The deployment model must contain exactly one SmartNamingService which is distributed to a target computer with a deployment arrow. The following settings can be made:
port: Specifies the port of the naming service. The default value is suitable for most use-cases.
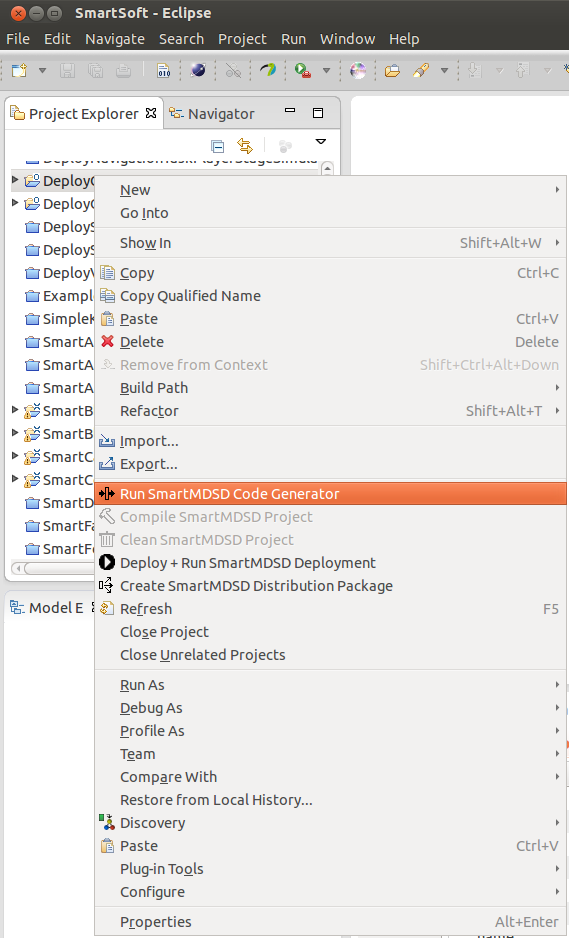
After the system configuration model and the deployment model are finished the code generator can be started. To do so, right click on the SmartSoft deployment project and choose "Run SmartMDSD Code Generator" (cf. figure 2.34).
The SmartMDSD Toolchain does not support cross-compilation. Therefore, the system deployment has to be developed and executed on the same architecture.
All SmartSoft dependencies are deployed automatically. If additional libraries should be used, they have to be added manually. To do so, adjust the script predeploy.sh. This script is generated for each component in the model and is run prior to the deployment of the component. The script can be used to add SmartSoft libraries that shall be deployed to the target device. These libraries will be searched in $SMART_ROOT/lib. The libraries are added as follows:
DEPLOY_LIBRARIES="$DEPLOY_LIBRARIES <library>.so"
If components should be deployed along with additional data files they have to be added after the code generation. After the code generation there exists a data-folder for every component instance inside the src-folder to which additional data files can be added. The screencast in section 3.1.6 demonstrates the deployment of components along with additional data files.
For every component in the model, a startstop-hooks script is generated. This script provides methods to call custom commands pre/post of starting/stoping the component during launch on the device. This script is being executed on the target device where the component is running. For example the script can be used to start and stop the morse simulator automatically.
For every component in the model, a predeploy script is generated. This script is run prior to deployment of component. E.g. use this script to collect data-files and copy them to src/<COMPONENT>_data, etc.
Precondition:
Deployment is done via scp which needs a password. We suggest to setup an ssh-key: before deploying an application create a ssh-key for the target device deployment once. To do so, enter in a terminal:
ssh-keygen
Then, use ssh-copy-id to transfer the key to the remote machine:
ssh-copy-id -i ~/.ssh/id_rsa.pub user@host
You should make sure that you can now login to the host without a password.
Deploying the application:
To deploy the application from the SmartMDSD Toolchain right click on the SmartSoft deployment project and choose "Deploy + Run SmartMDSD Deployment". After the deployment has finished, the application can be started (cf. section 2.4.4.1). If the toolchain was started with a terminal, the ssh yes/no as well as the password input are displayed in the terminal. If the toolchain was started with the icon, these inputs are displayed in a dialog.
To deploy the application without the toolchain, open a terminal and navigate to the deployment folder. Then enter the following command:
bash src-gen/deploy-all.sh


